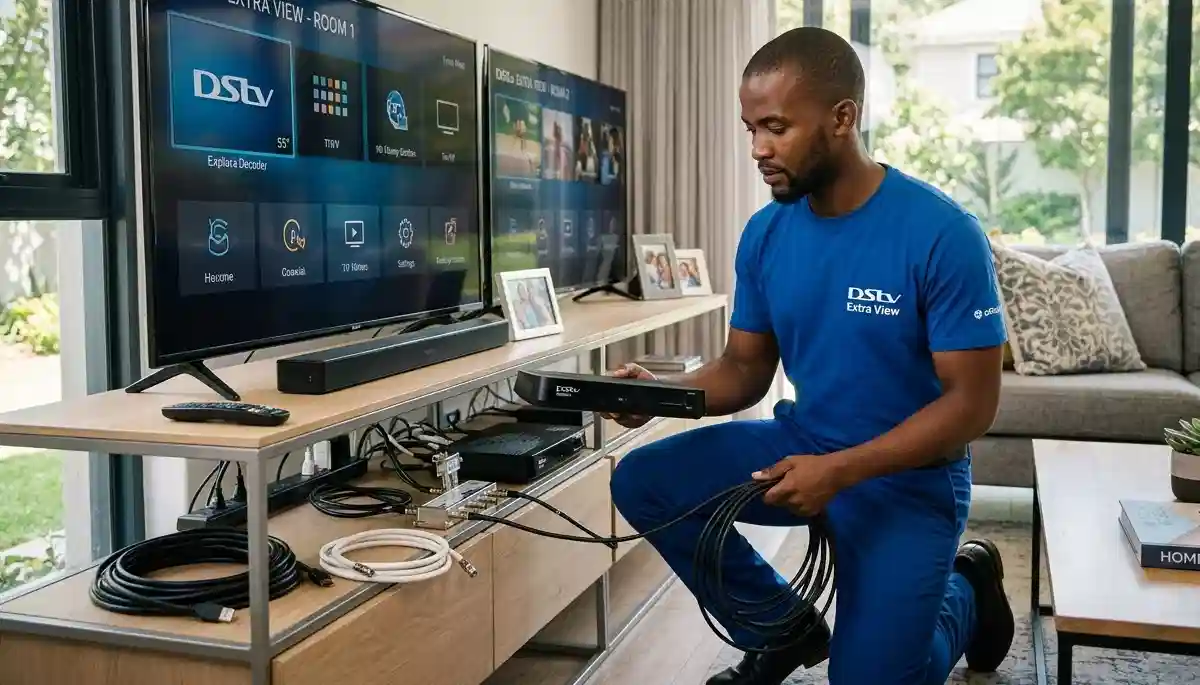
Professional Extra View installation transforms how your family watches TV – no more channel arguments!
Getting Extra View Right: Ultimate Multi-Room DStv Setup Guide 2026
Picture this: It’s the Rugby World Cup final. You’re glued to the action in the living room, but your teenager wants to watch a movie in their bedroom, and your partner wants to catch up on their favourite series in the main bedroom. With a properly configured DStv Extra View system, everyone watches what they want, when they want, without arguments or extra subscriptions.
At DSTV Installers Centurion, we’ve installed thousands of multi-room systems across Centurion, Pretoria East, and surrounding areas over 17+ years. We’ve seen every configuration, solved every error code, and helped countless families achieve entertainment harmony. Yet nearly 40% of the Extra View setups we encounter have configuration issues that lead to frustration.
In this comprehensive 4,000+ word guide, we’ll walk you through everything you need to know about getting Extra View right – from decoder combinations and connection methods to heartbeat cable setup and troubleshooting the dreaded E143-4 error. Whether you’re planning a new installation or fixing an existing system, this guide has you covered.
📋 Quick Extra View Overview
✅ What You Need:
- Multi-output LNB (Quad/Octo)
- Compatible decoders
- Heartbeat cable connection
- DStv Extra View subscription
- Professional installation recommended
⚠️ Common Issues:
- E143-4 communication errors
- Incorrect frequency settings
- Wrong LNB type
- Poor signal distribution
- Decoder compatibility problems
👉 Need expert help? Contact our team for support or request a free installation quote today.
What is DStv Extra View and Why Do You Need It?
DStv Extra View is MultiChoice’s multi-room solution that allows you to connect up to three additional decoders to your main subscription. Unlike simply splitting the signal (which shows the same channel everywhere), Extra View lets each decoder tune into different channels independently – all while paying a fraction of a full subscription for each additional room.
Benefits of a Properly Configured Extra View System
- Cost savings: One premium subscription + R99 per additional room vs multiple full subscriptions
- Independent viewing: Different channels in different rooms simultaneously
- Recording flexibility: Schedule recordings from any connected decoder
- Parental control: Manage content access in kids’ rooms centrally
- Property value: Whole-home entertainment system adds appeal for buyers
Whether you’re in a compact townhouse needing just one extra room or a sprawling estate in Midstream requiring whole-home coverage, getting Extra View right transforms your viewing experience.
Adding extra TV points for multi-room setups requires professional planning and execution
The Hardware You’ll Need: Decoders, LNBs, and Cables
Before diving into configuration, let’s understand the essential components of any Extra View system. Getting these right from the start prevents 90% of common problems.
Decoder Compatibility: What Works Together
Not all decoder combinations play nicely together. Here’s what you need to know:
| Primary Decoder | Secondary Decoders | Limitations | Best For |
|---|---|---|---|
| Explora Ultra (4K) | Any HD, Explora, or Explora Ultra | Secondary decoders limited to HD quality | Future-proofed homes with 4K TV |
| Explora (any model) | HD or Explora (limited recording sync) | HD decoders can’t access recordings | Balanced recording + viewing needs |
| HD Decoder | HD only | No recording capability | Budget-conscious setups |
For detailed guidance on specific combinations, see our HD decoder setup for multiple rooms and Explora decoder installation for multi-room guides.
LNB Requirements: The Heart of Your System
The LNB (Low Noise Block) on your dish determines how many decoders you can connect:
- Single LNB: One decoder only – not suitable for Extra View
- Quad LNB: Four independent outputs – supports up to 4 decoders (ideal for most homes)
- Octo LNB: Eight outputs – supports up to 8 decoders (large estates, guest houses)
- Smart LNB: Specialized for Explora/Explora Ultra with simplified cabling
If you’re adding Extra View to an existing system, you’ll likely need upgrading cables for multiple rooms and a new LNB. We recommend professional assessment to ensure compatibility.
Cable Requirements: Don’t Compromise on Quality
For reliable multi-room performance, you need:
- RG6 quad-shield cable: Minimum standard – anything less invites interference
- Compression fittings: Screw-on connectors fail over time
- Separate runs: Each decoder needs its own cable from the LNB (no splitting!)
- Proper grounding: Protects against lightning damage
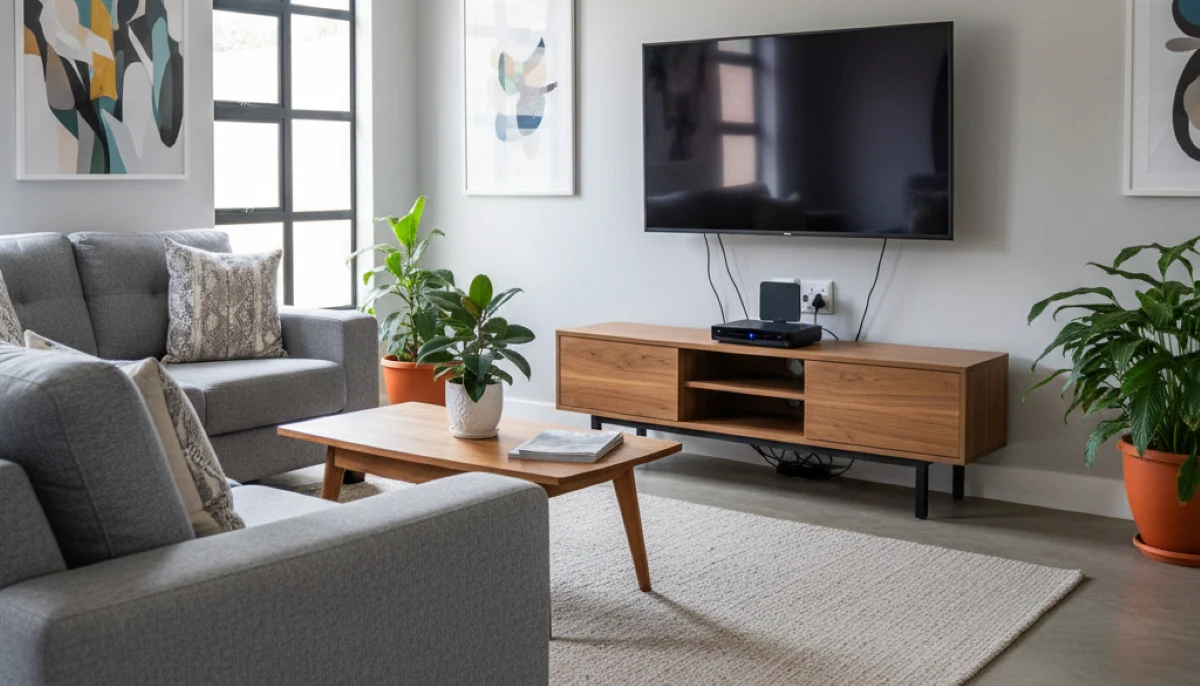
Our technician installing TV point photos show the professional standard we maintain. Proper installing TV cables in walls ensures a clean, long-lasting installation.
Decoder Combinations: Finding Your Perfect Match
With 17 years of experience, we’ve found certain combinations work better than others. Here’s our recommendation based on your needs:
Two-Decoder Setups (Ideal for Most Homes)
| Combination | Best For | Installation Complexity | Estimated Cost Range |
|---|---|---|---|
| HD + HD | Budget-conscious users, second TV basic viewing | ★★★☆☆ (Simple) | R1,500 – R4,000 |
| HD + Explora | Mixed usage (main room recording + bedroom viewing) | ★★★☆☆ (Moderate) | R1,500 – R4,000 |
| HD + Explora Ultra | Future-proofing with 4K in main room | ★★★☆☆ (Moderate) | R1,500 – R4,000 |
| Explora + Explora | Recording enthusiasts who want access in multiple rooms | ★★★★☆ (Complex) | R1,800 – R4,500 |
| Explora Ultra + Explora Ultra | Premium 4K experience in every room | ★★★★☆ (Complex) | R2,000 – R4,500 |
Three-Decoder Setups (For Larger Homes)
| Combination | Ideal Setup | Special Considerations | Estimated Cost Range |
|---|---|---|---|
| HD + HD + HD | Budget whole-home coverage | Limited recording capabilities, basic viewing only | R2,000 – R5,000 |
| HD + HD + Explora | Balanced features & cost | Primary decoder placement critical | R2,500 – R5,500 |
| HD + Explora + Explora Ultra | Gradual tech upgrade path | Requires advanced LNB setup, careful configuration | R2,500 – R6,000 |
| Explora Ultra x3 | Ultimate premium experience | Needs professional installation, large dish, octo LNB | R2,800 – R7,500 |
💡 Pro Tip from 17 Years Experience
Your primary decoder (usually the most advanced unit) should be placed where you watch TV most frequently. This becomes the “brain” of your Extra View system. For most families, that’s the living room or main entertainment area. Secondary decoders in bedrooms or kids’ rooms work perfectly as long as the primary is correctly configured.
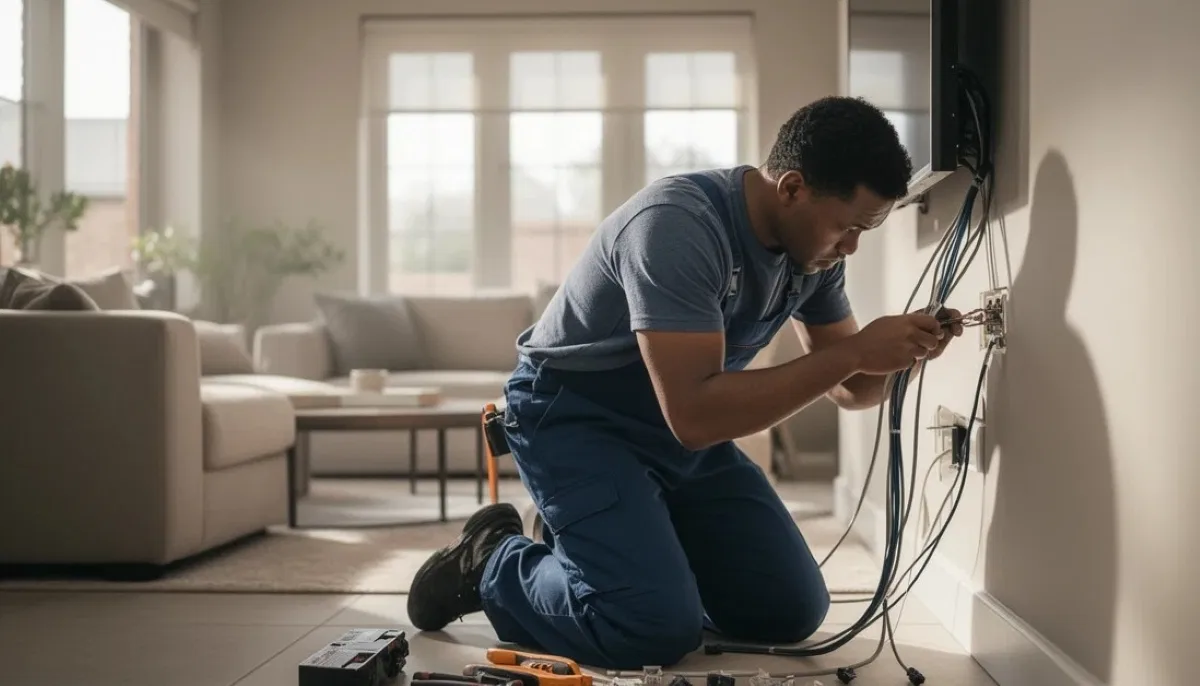
Professional TV point installation ensures proper signal distribution to every room
Connection Methods: The Infrastructure Behind the Magic
The right connection setup makes or breaks your multi-room experience. Here are the most common configurations we use for Centurion Extra View installation support and Pretoria East multi-room installations.
1. Smart LNB + Explora Decoder Setup
How it works: Single cable from Smart LNB to Explora decoder, which then distributes signal to secondary units via heartbeat connection.
Best for: Extra View setups with 2-3 Explora/Explora Ultra decoders. This is our most common recommendation for modern homes.
Advantages:
- Simplified cabling – only one cable from dish to primary decoder
- Full recording sync between Explora units
- Supports all Extra View features
Limitations: Doesn’t support mixing with HD decoders easily. If you need HD compatibility, see option 2.
Dish → Smart LNB → Primary Explora Decoder (Living Room)
                  → Heartbeat → Secondary Explora (Bedroom 1)
                  → Heartbeat → Tertiary Explora (Bedroom 2)
2. Twin LNB + Multi-switch Configuration
How it works: Twin LNB feeds into a multi-switch, which converts frequencies from universal to unicable, distributing signal to multiple decoders (up to 4 Explora and 4 HD/OpenView decoders).
Best for: Large homes with mixed decoder types, guest houses, or small hotels needing professional-grade distribution.
Advantages:
- Supports up to 8 decoders total
- Works with any decoder type (Explora, HD, OpenView)
- Professional-grade signal distribution
- Future-proof for expansions
Dish → Twin LNB → Multi-switch
                 → Explora (Living Room)
                 → Explora (Bedroom 1)
                 → HD Decoder (Bedroom 2)
                 → OpenView (Guest Room)
This advanced configuration requires expert installation. Contact our team for support if you need this level of complexity.
3. Quad LNB Direct Connection
How it works: Each decoder connects directly to one of the four LNB outputs. This is the simplest physical setup but requires careful frequency configuration.
Best for: Simple 4-room setups with HD decoders only, where recording sync isn’t needed.
Advantages:
- No additional equipment (splitters/multiswitches)
- Simple cabling – each decoder gets its own cable
- Works with any decoder type
Limitation: Doesn’t support communication between decoders – no shared recordings, and each decoder acts more independently.
Dish → Quad LNB
       → Output 1 → Decoder 1 → TV 1
       → Output 2 → Decoder 2 → TV 2
       → Output 3 → Decoder 3 → TV 3
       → Output 4 → Decoder 4 → TV 4
The Heartbeat Cable: Your System’s Central Nervous System
The heartbeat cable is what transforms separate decoders into a coordinated Extra View system. This special connection allows your decoders to communicate with each other – sharing viewing permissions, syncing recording schedules, and maintaining single-subscription compliance.
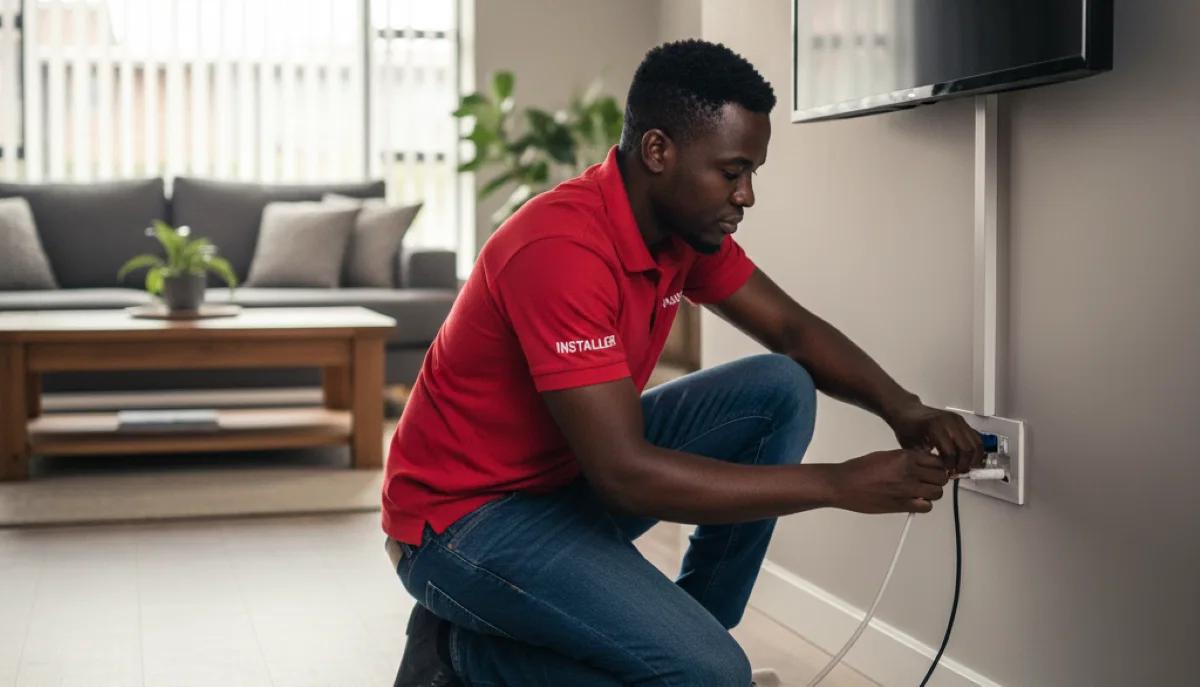
Proper installing TV cables in walls ensures clean, professional-looking installations
What the Heartbeat Cable Does
- Communication: Allows decoders to share viewing permissions
- Sync recordings: Schedule recordings from any connected decoder
- Transfer content: Move recordings between devices (Explora only)
- Compliance: Ensures DStv’s subscription rules are followed
Critical Configuration Steps for Heartbeat Setup
Follow these steps exactly to avoid the dreaded E143-4 error:
- Physical connection: Connect the heartbeat cable from the RF OUT port on your primary decoder to the RF IN port on your first secondary decoder. Daisy-chain additional decoders (RF OUT → RF IN).
- Set primary decoder: On your main decoder, navigate to Menu > Settings > Extra View > Set as Primary (Decoder 1). Confirm the setting.
- Configure secondary decoders: On each secondary decoder, go to Menu > Settings > Extra View > Set as Secondary (Decoder 2, 3, or 4).
- Assign unique frequencies: This is where most people get it wrong. Each decoder needs a unique frequency. Common working combinations:
- Primary: Frequency 1
- Secondary 1: Frequency 2
- Secondary 2: Frequency 3
- Secondary 3: Frequency 4
- Set distinct indexes: Similarly, each decoder needs a unique index number (1, 2, 3, 4).
⚠️ Critical Warning
90% of communication errors (including E143-4) stem from incorrect frequency or index settings. Double-check these values before saving! Write them down – you’ll need them if you ever need to reset.
Heartbeat Cable Diagram
Here’s how your connections should look:
Primary Decoder (Living Room)
RF OUT → [Heartbeat Cable] → RF IN (Secondary 1 - Bedroom)
                             RF OUT → [Heartbeat Cable] → RF IN (Secondary 2 - Kids Room)
                                                          RF OUT → [Heartbeat Cable] → RF IN (Secondary 3 - Study)
Troubleshooting the Dreaded E143-4 Error
The E143-4 error (“Decoder communication failure”) is the most common issue in multi-room setups. Here’s how to resolve it:
Step-by-Step Troubleshooting Guide
- Ensure heartbeat cable is firmly connected at both ends – loose connections are the #1 cause
- Verify cable isn’t damaged, pinched, or kinked
- Confirm correct ports used: RF OUT on primary → RF IN on secondary
- Check that all connections are using proper coaxial connectors, not makeshift splices
- Confirm only ONE decoder is set as primary – multiple primaries cause chaos
- Check all frequencies and indexes are UNIQUE – no duplicates
- Ensure secondary decoders aren’t set to “Standalone” mode
- Verify the correct frequency range (usually 950-2150MHz for DStv)
The reboot order matters – follow exactly:
- Power OFF primary decoder first
- Then power OFF all secondary decoders
- Wait a full 2 minutes (this clears all memory)
- Power ON primary decoder
- Wait until fully booted and showing channels (3-5 minutes)
- Power ON secondary decoders one by one
This sequence re-establishes proper communication hierarchy.
If all else fails:
- Menu > Settings > System Settings > Factory Reset on all decoders
- Start configuration fresh from step 1
- Note: You’ll lose all recordings and saved settings
This resolves 95% of persistent errors caused by corrupted configurations.
If these steps don’t resolve the issue, you likely have a hardware problem requiring signal troubleshooting for multi-room setups by professionals.
TV mounting in each room completes your multi-room entertainment setup
Real-Life Success Story: The Van Der Merwe Family Setup
Nothing illustrates “getting Extra View right” better than a real example from our installation records.
The Challenge
The Van Der Merwe family of five in Centurion wanted:
- A new Explora Ultra decoder in their lounge for 4K viewing
- Their existing Explora 3B decoder moved from the lounge to the main bedroom
- Their HD decoder moved from the main bedroom to the kids’ playroom
Previous attempts by another installer left them with:
- Constant “error E143-4” errors on both secondary decoders
- Decoders freezing randomly
- Intermittent signal loss
- Family arguments about what to watch (the exact problem Extra View should solve!)
Our Solution
- Hardware assessment: The existing single LNB couldn’t support three decoders. We installed a new Quad LNB with professional-grade cabling.
- Strategic placement:
- Explora Ultra (primary) in living room – the family’s main viewing area
- Explora (secondary 1) in main bedroom – parents’ space
- HD decoder (secondary 2) in playroom – kids’ entertainment
- Professional signal distribution: Ran new RG6 cables to each location with proper wall plates and compression fittings.
- Heartbeat configuration: Daisy-chained decoders with custom frequency settings (1, 2, and 3) and unique indexes.
- Full system test: Verified independent channel viewing in all rooms, tested recording functions, and demonstrated operation to the family.
The Result
Flawless Extra View experience with zero decoder conflicts. Parents can record shows in the bedroom while kids watch cartoons, all while dad enjoys 4K sports in the living room. No more arguments, no more errors.
Mrs Van Der Merwe said: “We’d almost given up on having TV in multiple rooms. The difference professional installation made is incredible – it just works, every time.”
Planning Your Multi-Room Setup: Timeline and Preparation
A proper multi-room installation requires planning. Here’s what to expect:
Installation Timeline
| Number of Rooms | Installation Time | Key Factors |
|---|---|---|
| 2 Rooms | 2-3 hours | Cable routing, LNB upgrade if needed |
| 3 Rooms | 3-4 hours | Additional cable runs, configuration time |
| 4 Rooms | 4-6 hours | Complex distribution, potential multiswitch |
| 5+ Rooms | Full day | Commercial-grade installation, multiswitch required |
See our guide on plan timing for multiple room setups for detailed breakdowns.
Preparation Checklist
Before installation day, ensure:
- Clear access to all rooms where decoders will go
- Power outlets near each TV location
- Clear path for cable routing (we’ll advise on best routes)
- Estate/complex approval if required (we can help)
- Your DStv subscription is active and includes Extra View
Our preparing for a smooth multi-room installation guide covers every detail.
Advanced Considerations for Larger Homes
If you’re in a large property like those in Silver Lakes, Waterkloof, or Midstream, you may need additional considerations:
Signal Distribution for Large Properties
- Multi-switch systems: For homes with 4+ decoders or mixed decoder types
- Signal amplifiers: Compensate for long cable runs (over 30m)
- Distribution amplifiers: For whole-home systems in estates
Integrating with Other Systems
A complete home entertainment setup often includes:
- WiFi extension to support multiple decoders – streaming features need reliable internet
- Home setup considerations for other tech systems – coordinate installations
- Room climate tips for decoders and equipment – prevent overheating
Maintenance Tips for Long-Term Performance
Keep your Extra View system running smoothly with these practices:
Monthly reboots
Power cycle all decoders monthly to clear memory and refresh connections. Do this in the correct order (primary first, secondaries after).
Cable checks
Inspect connections every 3 months for corrosion or wear, especially outdoor cables. Loose connections cause intermittent problems.
Software updates
Enable automatic updates in settings. If disabled, check manually every 3 months for optimal performance and security.
Ventilation
Ensure 10cm clearance around each decoder – heat is the #1 cause of premature failure. Never enclose in cabinets without ventilation.
Surge protection
Use quality power strips with surge protection for each decoder. Lightning damage is common in summer storms.
Annual professional check
Schedule a technician visit yearly to optimize your system’s performance, check signal levels, and update configurations as needed.
Frequently Asked Questions
You can connect up to 3 additional decoders (4 total including the main decoder) with a standard Extra View subscription. For larger setups, commercial options are available – contact our team for support.
No, but there are limitations. Explora and Explora Ultra work best together. HD decoders can be added but won’t have recording access. See our Explora Ultra multi-room setup guide for details.
If you have a single-output LNB, you’ll need to upgrade to a Quad or Octo LNB. Our satellite dish placement for best signal guide explains the requirements. We can assess your current setup during a free consultation.
For basic Extra View, internet isn’t required. For streaming features (Catch Up, Showmax), each decoder needs 4-6Mbps. For multiple decoders streaming simultaneously, we recommend 25Mbps+ and WiFi extension to support multiple decoders.
Follow our troubleshooting guide above. If that doesn’t work, you may have hardware issues requiring signal troubleshooting for multi-room setups by professionals.
Yes – that’s the whole point of Extra View! Each decoder can tune into any channel independently, subject to your subscription package. Extra View installation services ensure this works flawlessly.
As of 2026, Extra View costs R99 per additional decoder per month, plus your main subscription. Contact DStv directly for current pricing.
In most cases, yes. You’ll need a compatible LNB and cabling to new locations. We offer upgrading cables for multiple rooms as part of our service.
When to Call the Professionals
While many setup aspects are DIY-friendly (check our guide on step-by-step DStv installation guide to learn more), consider professional help for:
- Complex wiring: Multi-story homes or long cable runs through walls
- Signal distribution issues: When some rooms have poor signal quality
- Advanced configurations: Combining 4K and HD decoders, large systems
- Persistent E143-4 errors: After basic troubleshooting fails
- LNB upgrades: Moving from single to quad or octo systems
- New construction: Pre-wiring during building saves huge costs later
Our team specializes in Centurion Extra View installation support and Pretoria East multi-room installations. We’ve done this thousands of times – we know what works.
Ready for Perfect Multi-Room Entertainment?
Don’t let configuration headaches ruin your viewing experience. Our team serves all Centurion and Pretoria East suburbs with same-day service available.
R250 call-out fee (credited to installation) | 12-month warranty | Free consultation available
Part of the ServiceLink SA trusted technician network – verified, insured, and guaranteed.