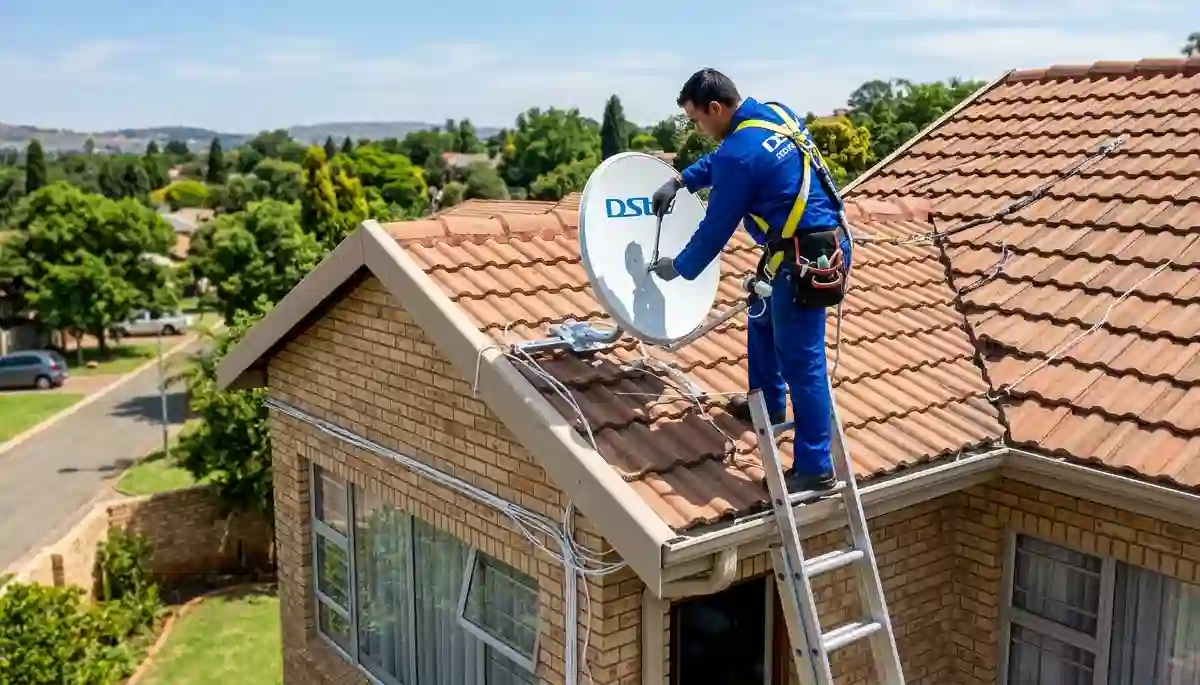
Professional satellite dish installation – proper alignment ensures years of trouble-free viewing
How to Install DStv: 2026 Complete Step-by-Step Guide (Save R1,500)
Thinking of installing DStv yourself to save money? With DStv installation costs in South Africa ranging from R650 to R2,500, DIY installation can seem tempting. But after 17 years and over 15,000 installations across Centurion, Pretoria East, and Gauteng, we’ve seen that 90% of signal problems stem from poor installation.
At DSTV Installers Centurion, we believe in empowering homeowners with knowledge. This comprehensive 4,500+ word guide walks you through every step of installing DStv – from choosing the right location to final decoder setup. Whether you’re a confident DIYer or just want to understand what professional installers do, this guide has you covered.
👋 Centurion Special: Skip the hassle! Our professional installation starts at R650 with same-day service. Call 074 242 3922 or get a free quote – our R250 call-out fee is Gauteng’s lowest.
📋 Quick Installation Overview
✅ You’ll Need:
- Satellite dish (60-80cm)
- LNB (Single/Quad)
- RG6 coaxial cable
- DStv decoder
- Basic tools
⏱️ Installation Time:
- DIY: 3-6 hours
- Professional: 1-3 hours
- Multi-room: 4-8 hours
- Signal optimization: 30-60 min
👉 Need professional help? Book a DStv installer near you or get a professional installation quote today.
Why Proper DStv Installation Matters
A perfectly installed system delivers:
- Crystal-clear HD/4K quality without pixelation during your favourite shows
- Zero signal drops during rain or wind – crucial during Gauteng storms
- Longer equipment lifespan (5-8 years vs 2-3 years from rushed installs)
- Future-proof setup for Extra View or Explora Ultra upgrades
This guide combines DIY steps with pro secrets we normally charge for. Let’s begin!
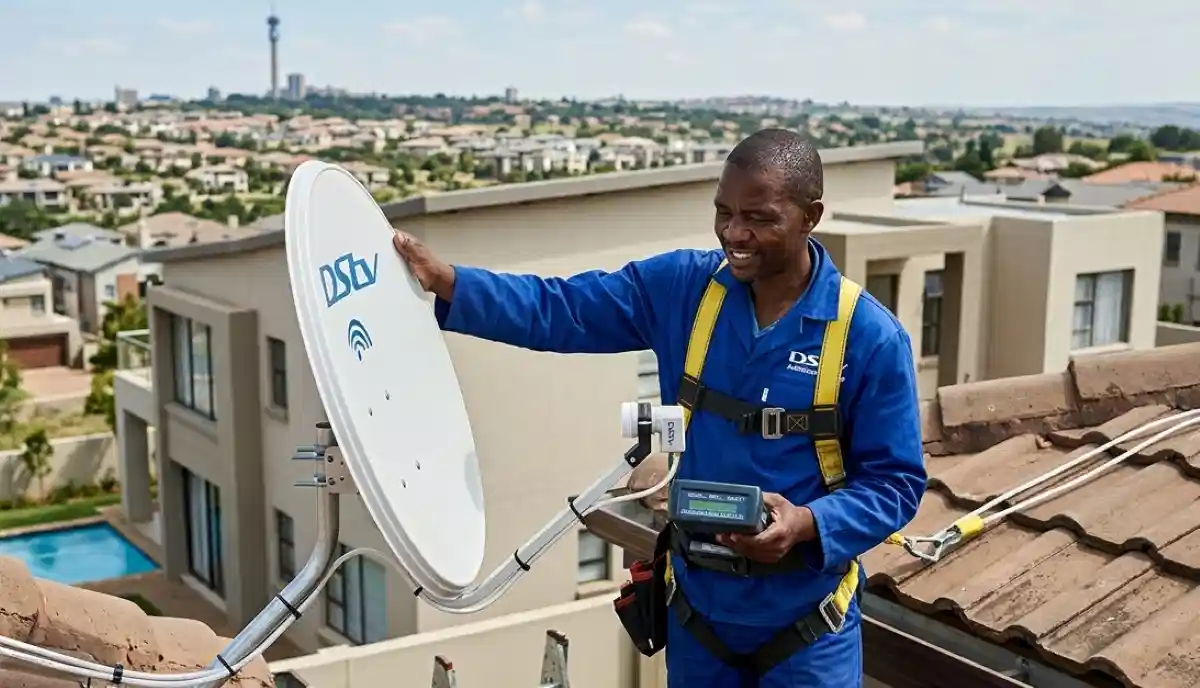
Professional signal meters ensure perfect alignment – something DIY installers rarely achieve
What You’ll Need: Tools & Equipment Checklist
Before starting, gather everything you need. Missing tools mid-installation can add hours to your project.
Essential Tools
- Adjustable wrench (for mounting bolts)
- Phillips and flat-head screwdrivers
- Spirit level (critical for proper alignment)
- Drill with masonry bits (for brick walls)
- Coaxial cable stripper and crimping tool
- Multimeter (optional but recommended for testing)
- Safety harness and ladder (for roof work)
- Compass or smartphone with compass app
DStv Components
- Satellite dish: 60cm for HD, 80cm for Explora/weak signal areas – see our satellite dish installation guide for size recommendations
- LNB: Single for basic, Quad for Extra View (up to 4 decoders)
- DStv decoder: HD decoder, Explora, or Explora Ultra
- RG6 coaxial cable: Minimum 20m, quad-shield for best quality
- Wall mounting brackets (included with most dishes)
- Waterproofing seals and silicone sealant
- F-type compression connectors (not screw-on)
💰 Cost-Saving Tip
Buying equipment separately? You might save R200-R500, but ensure compatibility. We supply genuine DStv-approved components – ask about our package deals. See our installation costs guide for detailed pricing.
Step 1: Choosing the Perfect Dish Location
The single most important decision in your installation. Get this wrong and nothing else matters.
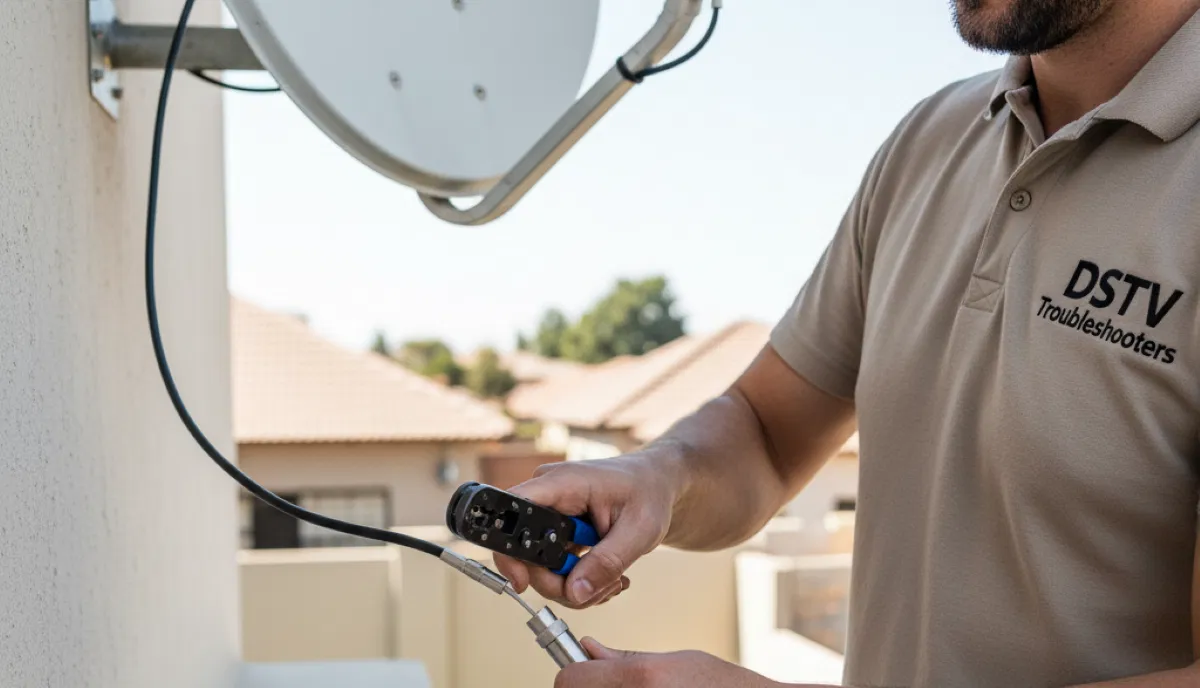
Proper F-type connector installation – critical for signal quality
Centurion-Specific Installation Factors
Based on our experience across DStv installation in Centurion, these factors matter most:
- Clear line of sight to the northeast – DStv satellites are at 68.5°E (Intelsat 20). Use a compass app: azimuth approximately 45.2° magnetic.
- Elevation angle of 34.8° – use an inclinometer app to measure from horizontal.
- Distance from obstacles – trees and buildings need at least 3x the dish diameter clearance.
- Wind stability – avoid flimsy mounts or locations exposed to strong winds.
- Cable path – plan route from dish to decoder (avoid sharp bends, heat sources).
Location Options Comparison
| Location | Pros | Cons | Best For |
|---|---|---|---|
| Roof (tiled) | Best signal quality, clear view | Requires professional installation, safety risk | Most homes in Midstream and Silver Lakes |
| Wall-mounted | Easier access, safer | May need longer cable, ground-level obstructions | Single-storey homes, Garsfontein properties |
| Pole-mounted | Adjustable height, can clear obstacles | Needs concrete foundation, more visible | Properties with no suitable wall/roof |
| Balcony (apartments) | Only option for flats | Signal may be compromised, body corporate rules | Communal DStv installations in complexes |
⚠️ Critical Safety Warning
Roof installations can be dangerous. We recommend professional installation for any work above single-storey height. Our teams have full safety equipment and insurance – book a DStv installer near you for peace of mind.
Step 2: Dish Assembly & Mounting
Once you’ve chosen the location, it’s time to assemble and mount the dish.
Pro Assembly Technique (From 17 Years Experience)
- Assemble on the ground – attach LNB arm to dish before mounting (saves 30 minutes of awkward work at height).
- Use stainless steel bolts with Loctite 243 (blue) to prevent rust and loosening from vibration.
- Leave LNB cable 50cm longer than needed – this gives room for final adjustments.
- Apply silicone sealant on all bolt threads and entry points to prevent water ingress.
- Pre-set rough angles – azimuth 45°, elevation 35°, LNB skew -7°.
Mounting Safety Checklist
- Check for cables/pipes before drilling – use a stud finder
- Use masonry anchors for brick walls – never just screws
- Double-check level – 1° misalignment can cause 30% signal loss
- Ground the dish according to SABS standards to prevent lightning damage
- Weatherproof all penetrations with silicone sealant
⚠️ Warning: Improper grounding can destroy your equipment during lightning storms – common in Gauteng summers. If unsure, consult our signal repair team.
Step 3: Precise Dish Alignment (The Make-or-Break Step)
This is where most DIY installations fail. Even a 2-degree error can cause complete signal loss.
Explora installation requires precise alignment for full functionality
Centurion’s Optimal Alignment Settings
| Parameter | Value | Measurement Method |
|---|---|---|
| Azimuth (magnetic) | 45.2° | Compass (pointing northeast) |
| Azimuth (true north) | 43.7° | GPS-based compass |
| Elevation | 34.8° | Inclinometer from horizontal |
| LNB Skew | -7.3° (clockwise) | Rotation of LNB in its holder |
Alignment Pro Technique (What Professionals Do)
- Connect a portable monitor near the dish – or have someone inside watching signal strength.
- Access signal meter: Menu > Settings > Signal Strength (on your decoder).
- Loosen bolts slightly – just enough to allow movement.
- Move dish in tiny increments – 2mm adjustments at a time. Wait 3 seconds for meter to update.
- Find the peak – sweep horizontally first, then vertically. Note the maximum reading.
- Tighten bolts while maintaining signal – this takes practice; having an assistant helps.
- Target minimum 75% signal quality – 85%+ is ideal. Below 60% will cause dropouts.
Pro tip: Professional signal meters cost R3,000-R15,000 and show much more detail than decoder meters. Without one, you’re working blind. Our correct dish placement guide has more technical details.
📊 Real Data: Alignment Success Rates
- DIY without meter: 40% achieve acceptable signal
- DIY with borrowed meter: 70% achieve acceptable signal
- Professional with proper equipment: 99% achieve optimal signal
Our technicians carry R20,000+ worth of alignment equipment. Book a professional installation for guaranteed results.
Step 4: Cable Routing & Termination
Poor cabling is the second most common cause of signal issues. Follow these professional standards:
Professional Cable Management
- Use UV-resistant cable clips every 50cm to secure cable – prevents wind damage and sagging.
- Create drip loops before entry points – water runs down to the bottom of the loop, not into your wall.
- Seal wall penetrations with silicone sealant – prevents water damage and insect entry.
- Keep 2m extra cable coiled near the decoder – allows for future repositioning.
- Avoid sharp bends – minimum bend radius 10cm to prevent signal reflection.
- Never run cable alongside electrical wiring – causes interference.
Termination: The Critical Detail
How you connect the cable ends makes a huge difference:
- Use compression F-connectors – screw-on connectors work loose and let in moisture.
- Proper strip length – 6-8mm of center conductor exposed, no braid touching the center pin.
- Tighten firmly by hand + 1/4 turn with wrench – overtightening damages connectors.
- Weatherproof outdoor connections with self-amalgamating tape (not electrical tape).
If you’re unsure about cable work, our LNB and cable replacements service starts from R450 – often cheaper than buying tools for one job.
Step 5: Decoder Setup & Activation
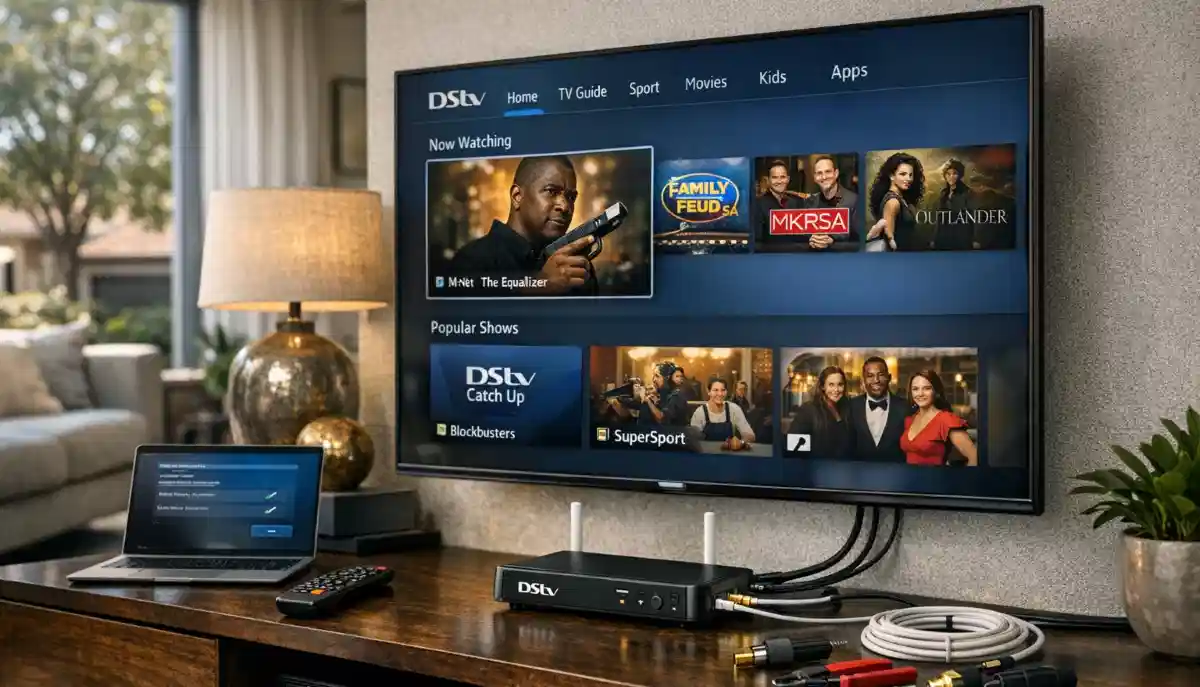
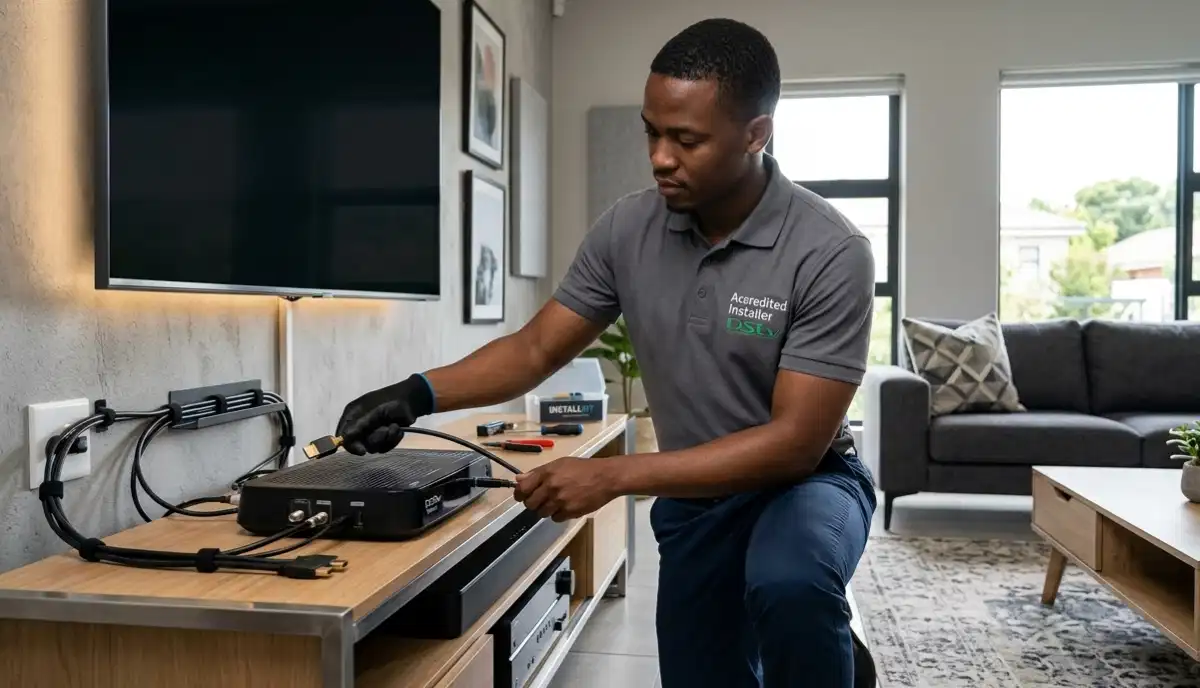
Professional decoder connection – HDMI ensures best picture quality
Decoder Installation Checklist
- Connect cables in correct order:
- LNB cable to “LNB IN” port (hand-tighten firmly)
- HDMI cable to TV (use high-speed HDMI for 4K)
- Power cable (leave until last)
- Power on and follow on-screen wizard – language, country, HD settings.
- Update software: Menu > Settings > System > Software Update (can take 10-30 minutes).
- Scan channels: Menu > Settings > Channels > Channel Scan (5-15 minutes).
- Test all channels – especially 100-199 (HD channels) and 1-5 (SABC).
Activation Process
Once hardware is installed:
- Call DStv on 011 289 2222 or use WhatsApp 060 060 3788.
- Provide your decoder ID (Menu > Settings > System Info).
- Confirm your subscription package.
- Wait 15-30 minutes for signal authorization (channels will appear gradually).
Note: If you have an existing subscription, you can transfer it to the new decoder online via the DStv website.
Common Installation Issues & How to Fix Them
Even with careful installation, issues can arise. Here’s how to diagnose and fix common problems:
| Problem | Likely Cause | DIY Solution | Professional Help |
|---|---|---|---|
| No signal (E48-32) | Dish misalignment, loose cable | Check connections, realign dish | Fix E48-32 error guide |
| Pixelation/freezing | Weak signal, cable damage | Check connectors, realign slightly | Fix signal problems |
| Some channels missing | Wrong LNB type, subscription issue | Verify LNB is universal type | HD decoder installation check |
| No channels on Extra View | Heartbeat cable not connected | Check daisy-chain connection | Extra View setup guide |
| Intermittent signal | Loose connector, water ingress | Tighten connections, check for water | Cable replacement |
| Poor HD/4K quality | HDMI cable, TV settings | Use high-speed HDMI, check TV input | Explora Ultra setup |
For persistent issues, see our common DStv signal problems guide for detailed troubleshooting.
DIY vs Professional Installation: The Real Cost Comparison
Let’s be honest about what DIY really costs:
| Factor | DIY Installation | Professional Installation |
|---|---|---|
| Upfront cost | R1,200-R2,000 (tools + equipment) | R650-R2,500 (all inclusive) |
| Time investment | 4-8 hours (plus research) | 1-3 hours (while you relax) |
| Success rate | 40-60% acceptable signal | 99% optimal signal |
| Warranty | None – you fix issues | 12-month workmanship warranty |
| Future modifications | Start from scratch | Easy upgrades (Extra View, etc.) |
| Safety risk | High (roof work) | None (insured professionals) |
Our recommendation: DIY for simple decoder swaps or if you’re experienced with heights and have proper tools. For anything involving dish installation, roof work, or extra TV points, professional installation is actually cheaper in the long run when you factor in your time and potential rework.
Installation for Different Property Types
Different homes require different approaches. Here’s what to consider:
Houses
Most straightforward. Follow the guide above. Pay special attention to:
- Tree growth in established suburbs like Irene and Faerie Glen
- Heritage considerations in older areas
- Multi-story homes may need longer cable runs
Complexes & Townhouses
Many complexes have specific rules:
- Check body corporate regulations before installing
- Some have communal DStv installations – you may only need to connect
- Balcony installations may need special mounts
- Our Midstream DStv installations team knows all estate rules
Apartments
- Often require building management approval
- May need longer cable runs to reach northern exposure
- Consider professional installation for safety
Estates
Prestige estates like Silver Lakes and Waterkloof often have:
- Strict HOA guidelines on dish placement
- Pre-approved installation areas
- Required professional installation
Tools Professionals Use (That DIY Users Don’t Have)
This builds credibility and explains why professional results are better:
- Satellite signal meters (R3,000-R15,000) – show exact signal strength and quality, not just a bar graph
- Spectrum analyzers – detect interference, cable faults, and LNB issues
- Professional compression tools – create perfect F-connectors every time
- Safety harnesses and equipment – for safe roof work
- Inclinometers and digital compasses – precise angle measurement
- Time-domain reflectometers – locate cable faults precisely
We bring all this to every installation. Get a professional installation quote and see the difference.
Real Case Study: The Midstream DIY Disaster
The Problem: A client in Midstream Estate attempted DIY installation. After 6 hours, they had:
- 30% signal quality (barely watchable)
- Cables running across the roof (looked terrible)
- Unsealed connections (would fail in rain)
- Dish mounted on a flimsy bracket (risky)
Our Fix:
- Re-aligned dish to 92% signal quality (45 minutes)
- Re-routed cables professionally with clips (1 hour)
- Weatherproofed all connections (30 minutes)
- Installed proper heavy-duty mount (1 hour)
The Result: Perfect signal, clean appearance, and peace of mind. Total cost: R950. They saved nothing by DIY and had to pay us anyway.
Lesson: If you’re not 100% confident, book a DStv installer near you from the start.
Maintenance Tips for Long-Lasting Performance
Monthly Checks
- Inspect cables for damage
- Check dish alignment after storms
- Clean LNB surface (gently)
- Check connectors are tight
Annual Maintenance
- Tighten all mounting bolts
- Replace weatherproofing tape
- Check grounding system
- Professional signal check
Every 3-5 Years
- Replace LNB (they degrade)
- Upgrade cables if needed
- Professional realignment
- Consider Explora Ultra upgrade
We offer maintenance packages starting from R450/year – cheaper than emergency repairs.
Frequently Asked Questions
Yes, if you’re comfortable with heights, have basic tools, and follow our guide carefully. However, our statistics show that 60% of DIY installations have signal issues requiring professional fixes. Consider whether the R650-R1,500 savings are worth potential frustration. See full cost comparison.
DIY: 4-8 hours for a complete new install. Professional: 1-3 hours. See our how long installation takes guide for detailed breakdowns by setup type.
Essential: drill, masonry bits, spanners, screwdrivers, spirit level, compass, cable stripper. See our installation requirements checklist for complete list.
In complexes and estates, yes – you’ll need body corporate approval. In freehold homes, no permission is typically needed, but check local bylaws. We handle all approvals for communal installations.
60cm is standard and works for most Centurion homes. For weak signal areas or Explora Ultra (4K), 80cm is recommended. Our technicians can advise based on your specific location.
Use a compass for azimuth (45°), inclinometer for elevation (35°), and watch the signal meter on your decoder. Our correct dish placement guide has detailed instructions and diagrams.
HD decoder installation is simpler – basic channel setup. Explora installation requires internet configuration, software updates, and recording setup. Both need the same dish alignment.
Yes, with Extra View setup. You’ll need a Quad LNB and separate cables to each room. This is significantly more complex than single-room installation – we strongly recommend professional installation.
We cover all Centurion suburbs, Pretoria East installations, Midstream DStv installations, Montana installation services, and most Gauteng areas. Contact us to check your specific location.
Why Centurion Homeowners Choose DSTV Installers Centurion
- 17+ years experience in Centurion and surrounds
- Accredited technicians with continuous training
- 12-month warranty on all installations
- Same-day service for most areas
- Free expert advice – we’re happy to answer questions
Related Guides
Multi-Room Setup Guide
Complete guide to installing DStv in multiple rooms.
Common Signal Problems
Fix pixelation, freezing, and signal loss.
Dish Placement Guide
Find the perfect spot for your satellite dish.
Best DStv Installers in Centurion
Compare top-rated local installers.
Installation Requirements
What to prepare before installation day.
DStv Internet Setup
Connect your Explora for streaming.
Ready for Perfect DStv Installation?
Whether you’re DIY-ing or want professional help, we’re here for all Centurion residents. Our team serves Centurion, Pretoria East, Midstream, Irene, and all surrounding areas with same-day service available.
R250 call-out fee (credited to installation) | 12-month warranty | Same-day service available | Find DStv installers near you
Part of the ServiceLink SA trusted technician network – verified, insured, and guaranteed.